Making a first Luanti mod: A new block type appears!
I pieced together enough information to make my first little Luanti mod. It creates a new "Foo" block, which can be crafted in the "Minetest Game". Now I can make a tutorial.

This was created with Luanti version 5.12.0, which was released
May 23, 2025 (three days ago, as of this writing).
Here’s how to make a new block type appear in a Luanti game.
Find/create the "mods" directory
Start up Luanti and go the About tab in the main menu.
Select the Open User Data Directory button.
(As the tooltip when you hover over the button explains, this will open "the directory that contains user-provided worlds, games, mods, and texture packs in a file manager/explorer.")
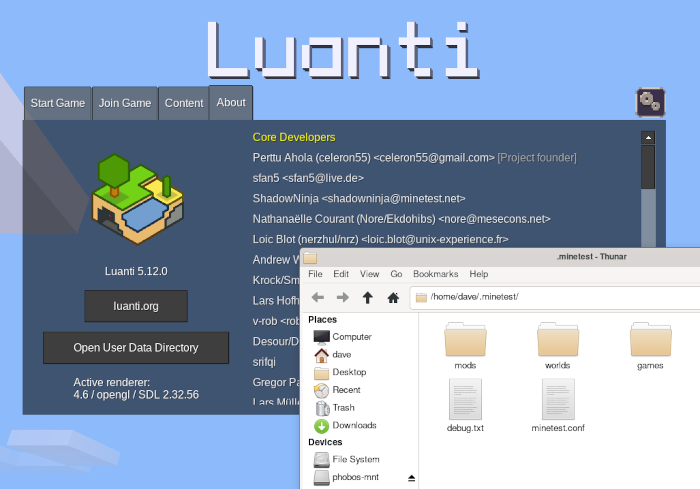
I’m running Linux with the XFCE desktop environment, so when I click the button, it opens the Thunar file manager with the following location:
/home/dave/.minetest/
Note: Luanti was originally called "Minetest". Confusingly, "Minetest Game" is the name of the base game I’m using for my mod. Please bear with me.
Mods go in the mods directory, which doesn’t exist until you have at least one mod installed. I didn’t have any mods installed, so I created the directory myself.
$ mkdir mods
Note: I tend to work from the command line, but creating directories and files for Luanti mods can all be done graphically in your operating system of choice.
Make a new directory for your mod!
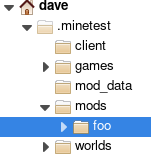
I’ll call my mod "Foo", so it’ll go into <luanti>/mods/foo.
$ mkdir mods/foo
Here’s a tree view in Thunar that shows what I’ve got:
See if your mod is visible
Believe it or not, making the directory is already enough to make your "mod" visible in Luanti. Let’s make sure we can see it.
I am using the classic "Minetest Game" by the Luanti team, which is a lightweight base for creating my tutorial mod. If you’re following along, you’ll need to install this game to continue.
If you don’t have any games installed yet, click the "Install a game" button.
If you do have games installed, they’ll show up as a horizontal list of icons at the bottom of the menu. Click the "+" button to add another.
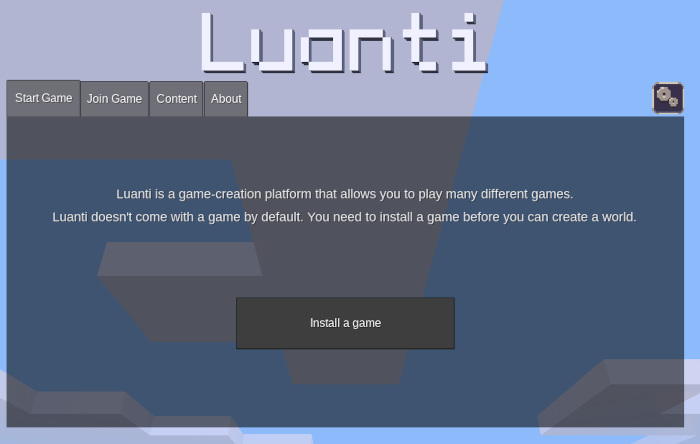
You can search for it, but "Minetest Game by Luanti" is probably on the first page since it is popular.
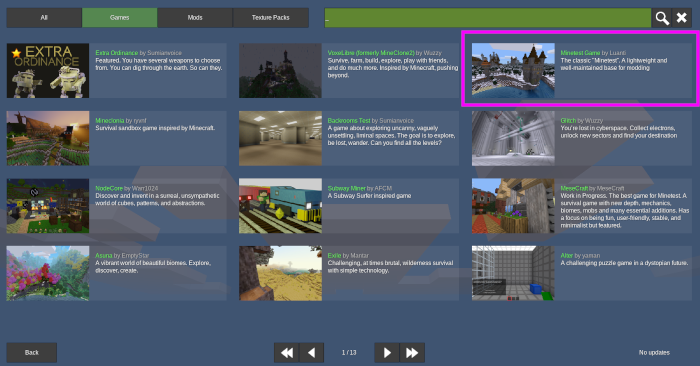
Click on Minetest Game and then click the Install button in the top right corner of the game’s description page to install it. Then click the Back button twice to return to the menu.
Now select Minetest Game from the horizontal list of installed games at the bottom of the main menu.
You’ll need to generate a new world to test with, so click the New button.
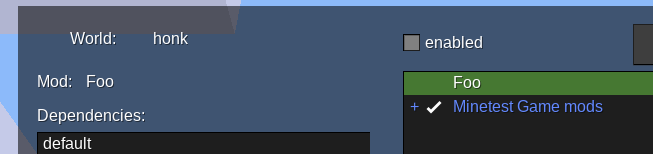
For no particular reason, I named my test world "honk".
Now for the fun part, click the Select Mods button.
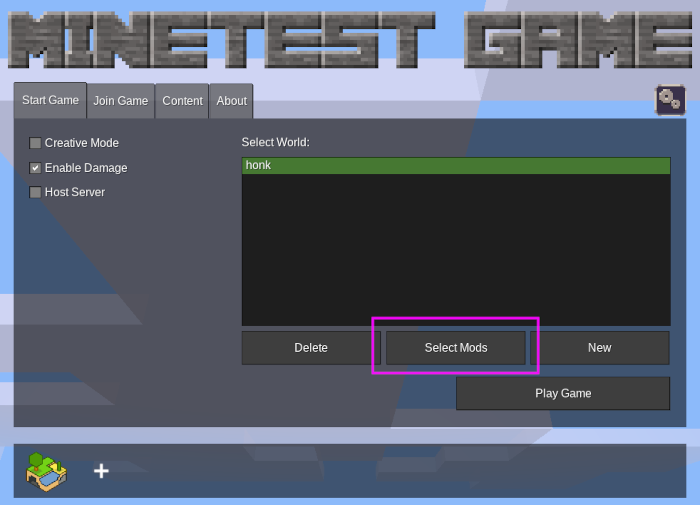
And there we are! Even though it’s just an empty directory, the "foo" mod is already visible.
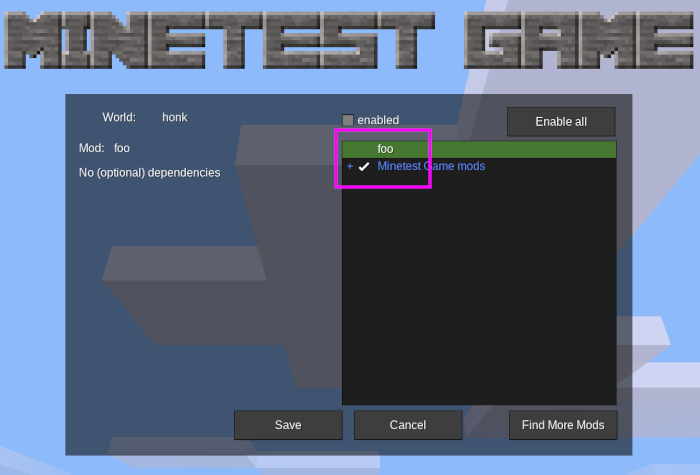
(Note: You can also click the little "+" button to see the Minetest Game mods. As I understand it, Luanti games are basically bundles of mods. So, knowing how to make mods is the first step in knowing how to make games.)
Create a mod.conf
A mod should have a configuration file. This is a text file called mod.conf
that exists in the root of the mod’s directory.
In my case, that’ll be:
mods/foo/mod.conf
Aside: I’m a software developer on unix-like platforms, so I’ll use the Vim editor to create and edit this file, but any text editor will do. On Windows, Notepad is perfectly fine for this, but a much better choice I typically recommend is Notepad++ (notepad-plus-plus.org).
Here’s what I’ve typed in mod.conf:
name = foo
description = Adds a new Foo block.
depends = default
The name is restricted to lower-case letters, numbers, and the underscore
("_") character. It cannot have spaces. You won’t know that the name is
invalid until you try to play the game.
For example, when I have an uppercase "F" in the name "Foo", I can see it in the mods list…
…but the upper-case "F" will cause an error when I try to play the game with the mod enabled:
Failed to enable mod "Foo" as it contains disallowed characters. Only
characters [a-z0-9_] are allowed.
Create an initialization script
The Lua in Luanti represents the Lua programming language (lua.org).
"Lua is a powerful, efficient, lightweight, embeddable scripting language."
In short, Lua was designed for exactly this sort of thing. It is used as a scripting language in other game engines and quite a few extensible programs. Learning a little Lua will go a long way.
As with the mod.conf file, our mod initialization script will be at the root
of the mod directory and will be named init.lua. It is also a text file and
should be edited with a text editor.
In classic software developer tradition, I’ll have my mod print a "Hello World!" message.
Here’s what I’ll put in my init.lua file:
core.log('"Hello World!" said Foo.')
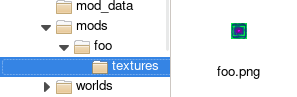
Here’s my init.lua sitting at the root of the mod
directory keeping mod.conf company:

When I re-start the game, my message prints out at the top of the screen:
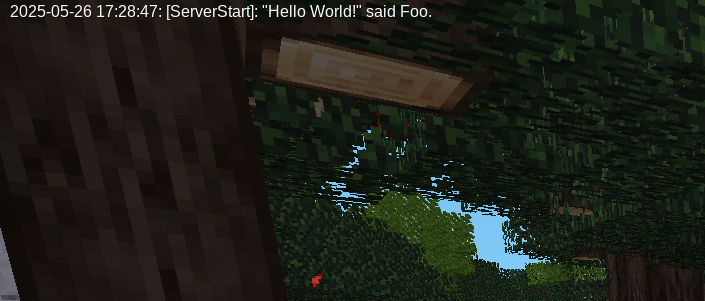
Logging with the core.log() function makes me happy.
Now it’s time to make that Foo block.
Make a block texture
Mod textures need to go in a textures sub-directory, so I’ll create that now:
$ mkdir mods/foo/textures
Looking at the contents of the Minetest Game, I see that the basic block textures are all 16x16 pixel PNG images.
I create a new 16x16 px image in my favorite open-source drawing program, Krita:
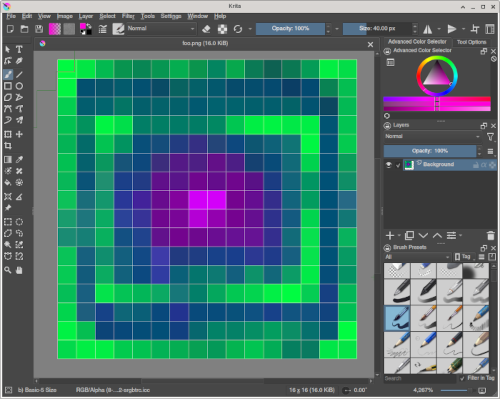
I saved this texture image as: mods/foo/textures/foo.png.
(Luanti can also load JPEG (.jpg) image files and sizes much larger than 16 pixels square. Do what makes sense for you.)
A new node, a new craftable
Within the Luanti engine, blocks are "nodes". To create a new block that uses my new texture, I need to "register" it with Luanti.
This will go in my init.lua file:
core.register_node("foo:foo", {
    description = "Foo Block!",
    tiles = {"foo.png"},
    groups = {cracky = 1}
})
The register_node() function takes a node name and a table of properties describing
the node.
-
name: The Launti node naming convention is
"<mod name>:<node name>", so the firstfooin"foo:foo"is the mod. If I added a "beans" node to this mod, I could call it"foo:beans". -
description: The node description will show up in the game (we’ll see a screenshot of that in a moment).
-
tiles: This is a list of image files. Luanti will look for these in the
textures/directory. -
groups: Luanti lets things (nodes, items, etc.) share properties by belonging to one or more groups.
The names of some of the built-in Luanti node groups are funny: cracky,
snappy, choppy, explody, and oddly_breakable_by_hand.
Okay, that makes a new block node. But how do we get the block to show up in the world?
The easiest way is probably to make it craftable so it can appear in our inventory.
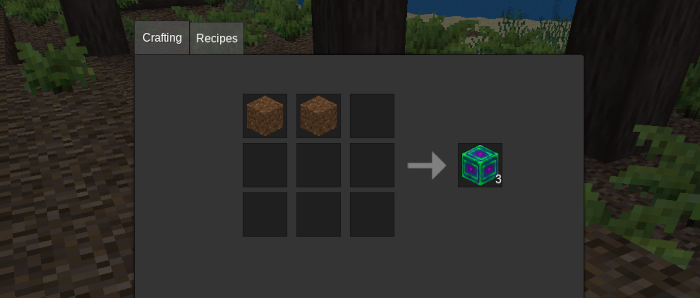
I’ll make a really simple crafting recipe that creates Foo Blocks:
core.register_craft({
    type = "shapeless",
    output = "foo:foo 3",
    recipe = {"default:dirt", "default:dirt"}
})
-
type: A "shapeless" recipe can be made by putting the items in the correct order, but anywhere in the 3x3 crafting grid.
-
output: The output format is:
"<thing> <quantity>", so"foo:foo 3"produces threefoo:foonodes. -
recipe: This is a list representing the 3x3 crafting grid with the names of the input items. This one is really simple: two dirt blocks side-by-side.
Put all of this together, and the entire contents of the mod’s init.lua is
now:
core.log('"Hello World!" said Foo.')

core.register_node("foo:foo", {
    description = "Foo Block!",
    tiles = {"foo.png"},
    groups = {cracky = 1}
})

core.register_craft({
    type = "shapeless",
    output = "foo:foo 3",
    recipe = {"default:dirt", "default:dirt"}
})
Does it work?
In the game, I press the i key to open the inventory/crafting menu and
drag two dirt blocks into the crafting area and there’s my Foo block!
Note that when I hover my cursor over the block, a tooltip shows
the node’s description.

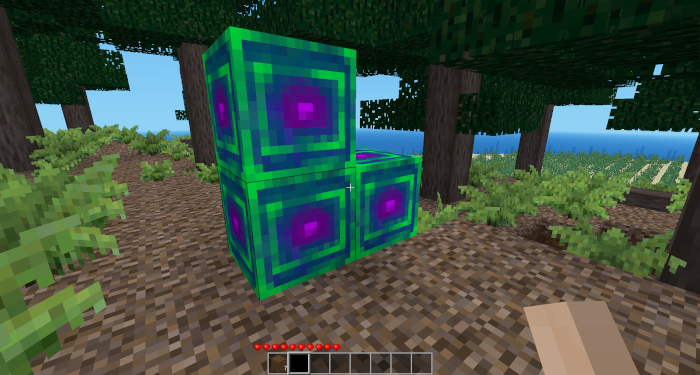
And, of course, I can start building with these blocks in the game:
This is my first Luanti tutorial; if I write additional Luanti tutorials or references, I’ll post them here.