Cardboard Project/Task Stack Display Ideas
Back to Making things with cardboard!
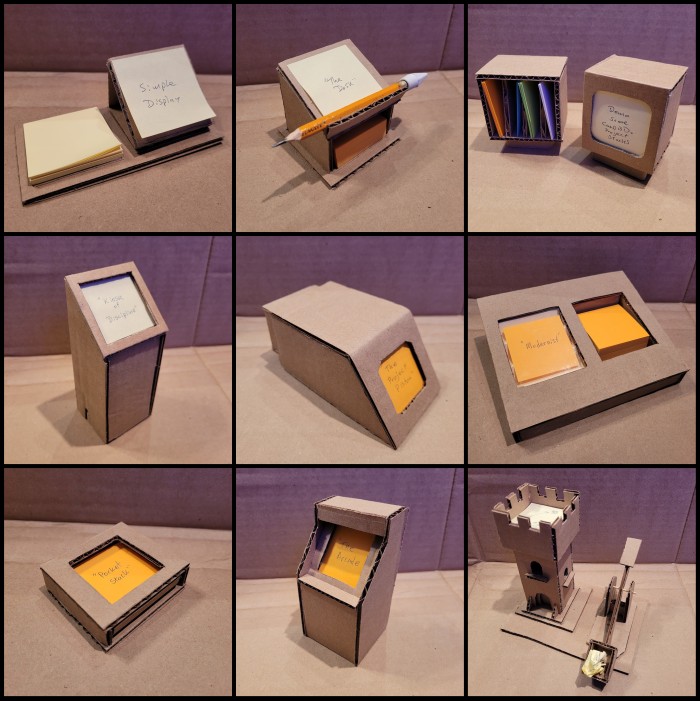
Here’s a whole page of fanciful Task Stack displays for your desk. The original intent was to make a "how-to" article. But I soon realized that I first needed to come up with a design that was functional, nice to look at, and fairly be easy to replicate without a lot of finicky measuring.
The end result of that ended up being a different design that is most like the "Project Piston" on this page. See the bottom of this page for a link to that!
Nevertheless, I did take in-progress pictures for each of these, so you can get a general sense of how they were made and how they function.
The Flat
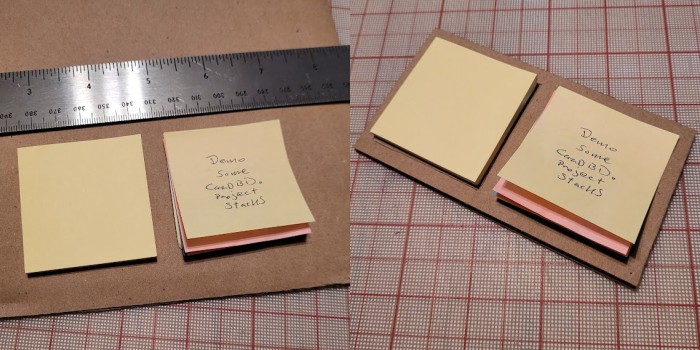
The simplest possible version is a rectangle of cardboard that holds The Stack and a pad of sticky notes.
Measure a nice, neat rectangle of cardboard to fit two sticky notes and cut it out. This gains you some intentionality and a little portability, I guess, but not much else.
Note that I’m using a metal ruler to guide my utility knife blade for most cuts to get them more-or-less straight.
Another tip is that you don’t have to cut all the way through the cardboard in one stroke. Three or more light passes, all with the ruler guiding the blade, sometimes gives me the neatest edge. Or you can do a light first pass with the ruler and then let that initial cut guide the rest with the ruler removed. I go by feel for each circumstance.
The Simple Display
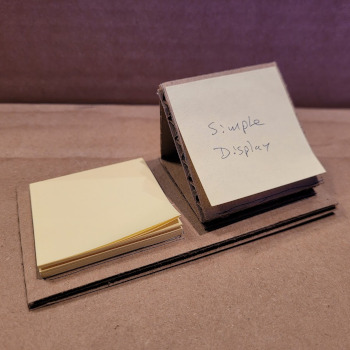
If you take The Flat above and add a nice little angled display area for the project stack, you get The Simple. You could make a fancier enclosed angled surface, but this one is nothing more than a single trimmed and folded strip of cardboard.
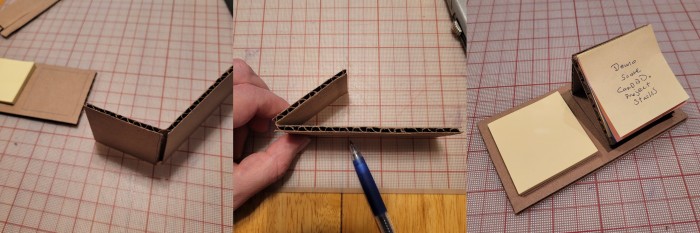
The first step is to cut a piece of cardboard so it’s the same width as your sticky notes. Then score (or cut halfway through the cardboard) to give yourself a fold that is one sticky note long. This is the top of the angled display as shown in the first of the three steps shown above.
I used the grid lines on my cutting mat to determine where to mark the next fold for the desired angle and did the same score/partial cut to make a neat fold. You can see me marking this point with a pen in the image above.
Lastly, cut the third side so it completes your triangle. (Not shown.)
If this is your first time, it might take a couple tries to get a nice, neat triangle with an angle you’re happy with. It only takes a few minutes, so go ahead and get exactly what you want. Who knows, you might use this display for many years.
I’m using hot glue for all of these projects. Hot glue has a viscosity and holding power that makes it really nice for cardboard projects. I often use packing tape for larger projects, but a glue or paste of some sort is easier to work with on these small ones.
The Desk
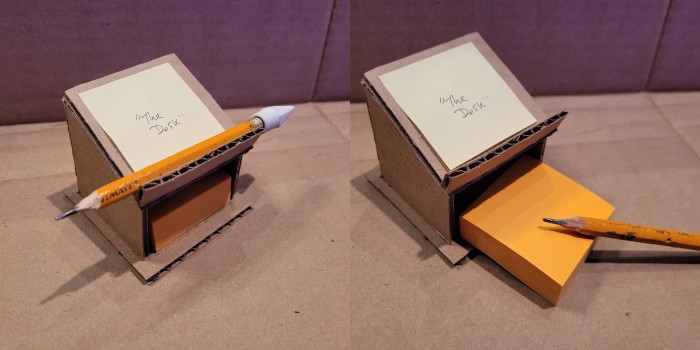
This one is a little more interesting, but still easy to make. It features an angled display with a lip at the bottom to keep your sticky notes from sliding off if the adhesive wears out or for resting a pen or pencil. Below is a storage area for the pad of sticky notes for your future to-dos.
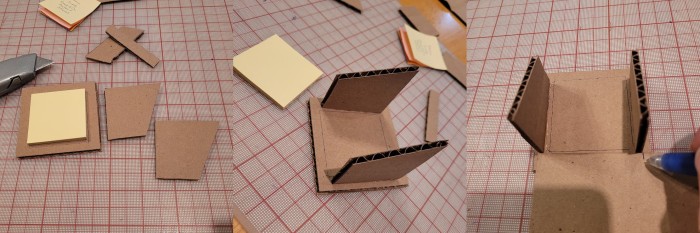
Here you can see I’ve cut a piece larger than the sticky notes as a base. Then there are two angled pieces. (I cut the first one to an arbitrary angle that looked good and "cloned it" by tracing it with a pen to make the second piece.)
You can see that the hot glue easily keeps the upright pieces in place even without any support. Then I’m marking another piece to match the width of the uprights…
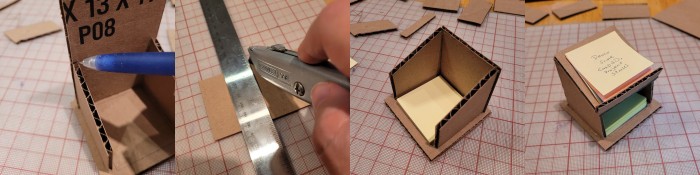
…And then cut that piece three times to become the back, top, and front lip of the desk.
I think the end result is functional and kind of cute, right?
The Kiosk of Discipline
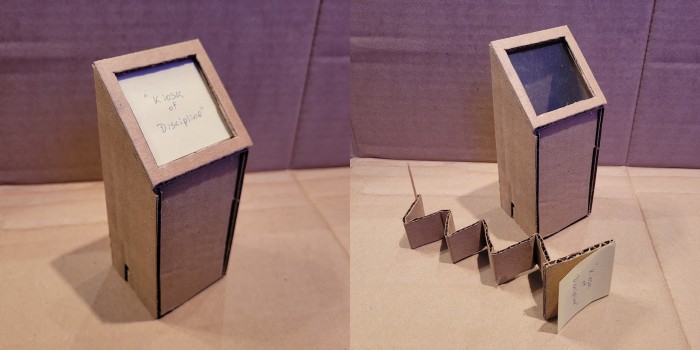
If you haven’t already read my motivations for these displays, you may not understand why the name of this one is a joke. So I’ll spell it out: The whole point of this is to reduce the need for discipline to tackle your list of tasks or projects. The Kiosk itself is providing the discipline so you don’t have to.
Anyway, this is the first one on the page to feature a clear window. It also has a mechanism to push a potentially huge number of sticky notes upward so that the top one is pressed neatly against the window for optimum viewing.
Slaps window of kiosk. "This baby can fit so many to-do items."
It’s also the first one that might make you say, "Hey, isn’t that inconvenient to add items or review my items?" To which I do my best sicko laugh and say, "Ha ha, yes! Yes!"
Seriously, the friction of adding and removing items in something like this is part of the point. I want it to be a bit of a ceremony to add new project. I want it to be a ceremony to open it up and remove the top item (and crumple it into a ball and spike it into the trash can). And, above all, I definitly want it to be a little difficult to quickly review what’s in the stack.
Here’s how it’s made:
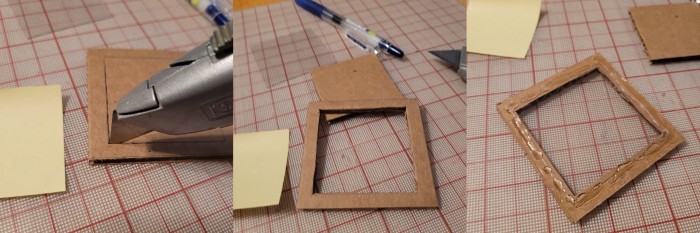
I use a sticky note to trace a square outline on my cardboard. A fresh utility blade allows me to make extremely neat straight cuts and square corners (don’t look too hard, though, there are flaws in this one).
In the second image, hopefully you can see the little square of clear plastic I cut out to be the window. In the final image, you can see that I cut the window so it’s larger than the opening, but smaller than the outer dimensions of the cardboard. I hot-glue it in place (any glue or tape will work fine for this, it just needs to be held in place).
Where does the window plastic come from? Same place as my cardboard: Discarded packaging and cartons! I get a lot of my clear plastic from food containers. I’m always on the look-out for nice flat pieces, but you can make neat things with the more interesting shapes, too. I just wash them, cut out the choice pieces, and save for later.
By the way, one of several advantages of using a clear window like this is that you can cut the display opening as big as you want (the full dimensions of your sticky notes and beyond!) without fear that the notes will pop out. You just need to have some mechanism to push the notes against the window for maximum readability.
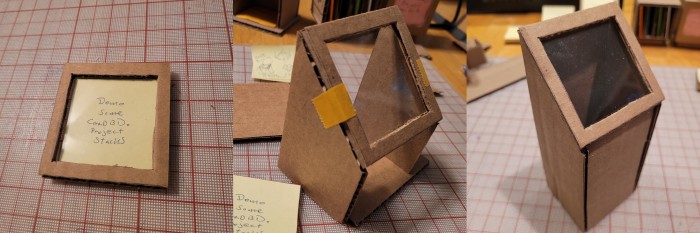
Here’s the window in place. Then testing the fit with some washi tape. The angled uprights are just like The Desk above, but much taller. And that "base" isn’t attached, I’m not sure why that’s there. This thing is open on the bottom.
(Aside: I like washi tape so much, I had some things to say about it that were too long to put on this already-too-long page, so I moved it to its own "card": Washi Tape.)
Finally, the window is attached and front and back pieces have been cut and attached as well. Nearly done.
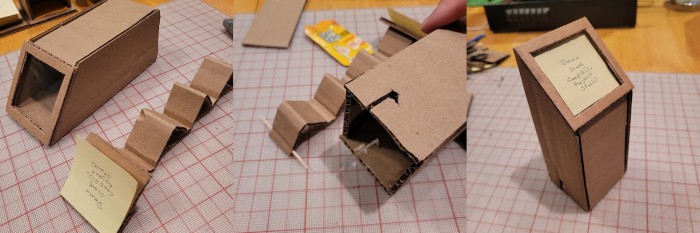
Finally, how do I make sure the stack of sticky notes is pressed up against the window? I thought about this for a while and decided to make a simple "spring" from folded cardboard. There’s a note-sized square of cardboard at the top of the spring and a wooden toothpick inserted into one of the flute channels (those spaces made by wavy paper inside the sandwich in corrugated cardboard) at the bottom.
There are two notches cut at the sides of the kiosk itself into which the toothpick slides to keep the spring in place. It works really well, actually, and is not nearly as annoying to load as you’d think. Just stick your stack on the top, slide it in, and lock the toothpick into the notches.
A spring-loaded kiosk-style magazine of sticky notes this big would comfortably hold a lifetime supply of tasks. Is that comforting or terrifying?
The Project Piston
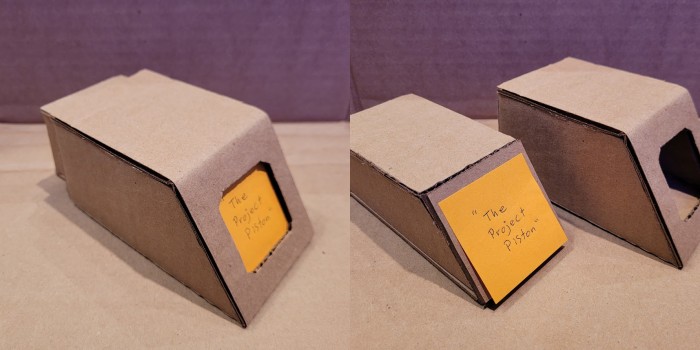
I liked the Kiosk, but felt the spring was a bit too awkward to describe (the idea was to have a design I could write up in a how-to guide).
Something that used friction or gravity would surely have less parts to make and describe.
(Is it just me, or does the orange sticky note make the picture above look vaguely like a sweet potato (Convolvulaceae) cut at an angle?)
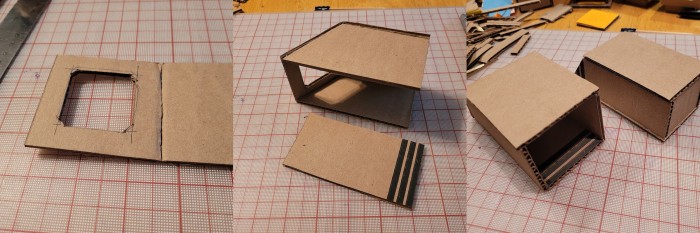
I thought a square opening with angled corners for the display would look good, but I didn’t like how this one turned out. I’m not sure if it’s because I cut it a little too small or if I just didn’t get the cuts neat enough?
Anyway, this is another angled display with a "window" on the top, angled sides, and a solid front and back. What makes it unique is the piston part - another, smaller angled box that slides into the larger display.
I was making this up as I went, so there aren’t a lot of in-progress shots. But hopefully you can see that there is a larger angled box that is open on the end and a smaller angled box that is closed on the end.
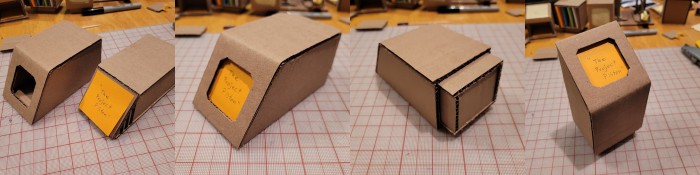
To give the piston part enough friction to hold in place by making it just the right size was a lot of trial and error shaving the pieces down to size. (So much for an easier design for a how-to!)
But it does work really well. Loading it is even simpler and more fool-proof than the Kiosk’s internal spring.
The funny thing is that I pictured it being horizontal the whole time I was building it, but when it was done, I realized that it worked just as well as a vertical display like the Kiosk (and that the Kiosk could be horizontal). Go figure. Anyway, that makes these designs even more versatile.
The Midcentury Modern
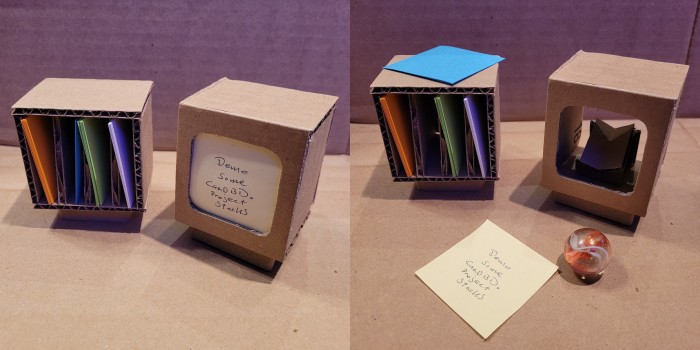
Here’s the first of the really playful designs. I started with a little box with a rounded window on the front. It looked a little like an old CRT television, so I put a base on it and made a matching "record cabinet" to hold various colors of sticky notes.
It’s whimsical and silly, but it does have one interesting trick up its sleeves: What mysterious force keeps the sticky note stack pressed firmly against the window? Answer: Gravity!
See that marble in the second shot? I know it’s a little hard to see in the shadowy confines of the "television" box, but there’s a little cardboard ramp in there. The marble sits on the ramp and pushes forward on the note stack using the power of gravity! I’ll let you decide how practical that is, but I was pleasantly surprised at how well this idea actually works in practice.
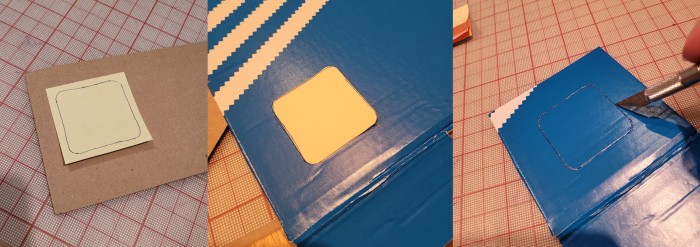
I’d like to point out that if you want an easier time cutting out specific shapes, see if you can find some really thin-walled cardboard like this shoebox material. It’s still corrugated, but the flutes are incredibly small and the paper is lighter than that used in the big shipping boxes.
An X-Acto blade can easily trace a curve with this stuff, so I was able to make this nice rounded square "old TV" cut-out.
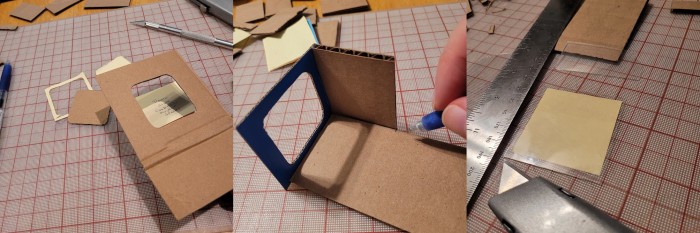
I seem to have failed to get any more in-progress shots of this build beyond getting the opening and clear window plastic piece cut to size.
So I hope you can see the the angled ramp for the marble well enough in the glamour shot above and imagine how it all works.
The Modernist
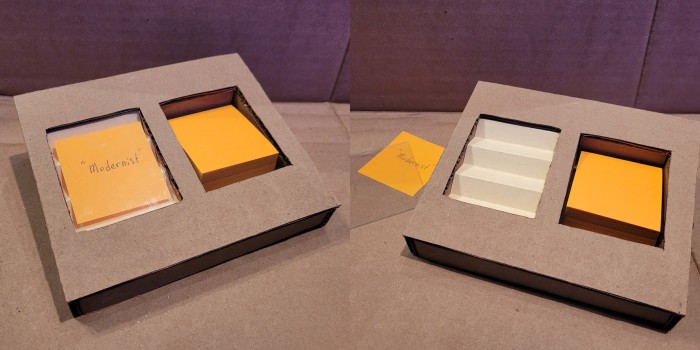
This one was mostly a failure in terms of functionality, but I like how it looks.
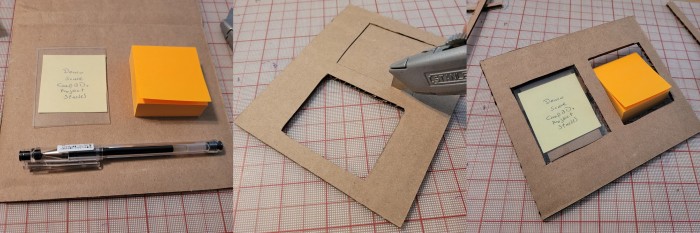
The top is just a sleek rectangle, so I started with the two cut-outs for the stack display window and a block of fresh sticky notes.
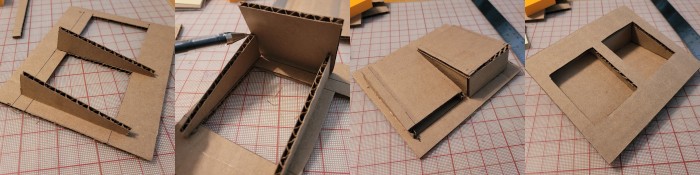
Then I cut angled strips of cardboard as inner side walls, and matching top and bottom and floor pieces and glued them all in place. The result is nice neat rectangular "wells" set at an angle below the top.
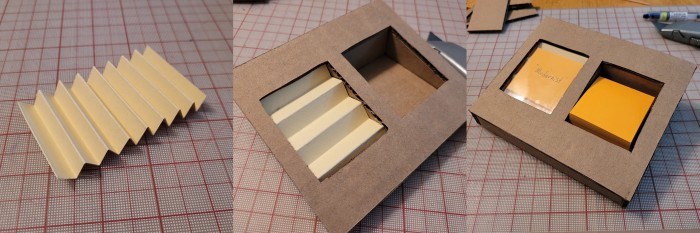
I made matching angled sides all around the display to make it "solid".
This one has another plastic window. The idea was to make an accordion of paper to provide a pushing force to press the stack into the window.
It worked!
Unfortunately, my idea to slide the window up to access the stack also technically worked, but it is incredibly annoying. Alas, this is the least pleasant of all the displays to actually use.
The Pocket Stack
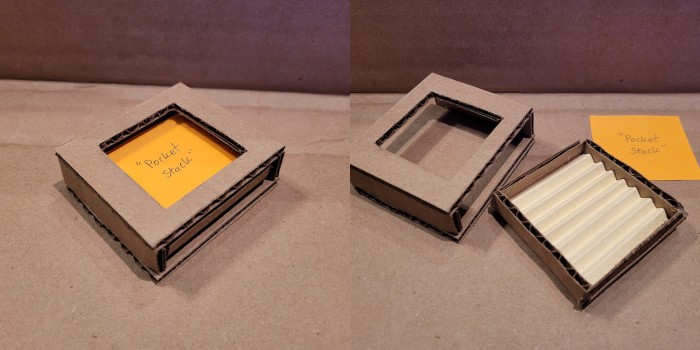
I think this one is pretty cute, functional, and simple. I experimented again with some accordion-folded paper at the bottom of the inner tray to make it more "expandable". In this case, that didn’t end up doing anything functional, but I thought it did look nice, so I kept it in.
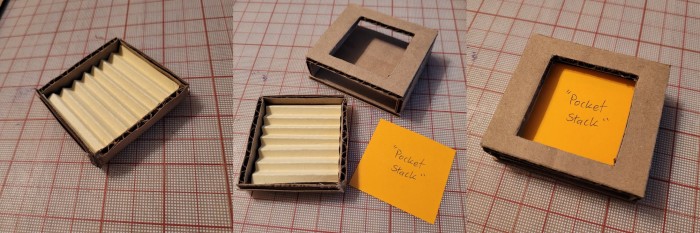
I guess these aren’t really "in-progress" shots. Sorry. It’s a simple thing to make. Cut a window out of a square of cardboard. Cut another square the same size as a bottom. Then two small side pieces. Glue it up. The tray is a single piece with corners clip out so they’ll meet when they fold up. I scored the sides of the tray with a knife to fold them up cleanly.
Obviously, some trial-and-error (or just pure dumb luck) is needed to get the tray to fit in the display with the desired amount of friction so it easily comes out (you push it from the other side with a finger), but doesn’t fall out if you are just carrying it around.
The Arcade
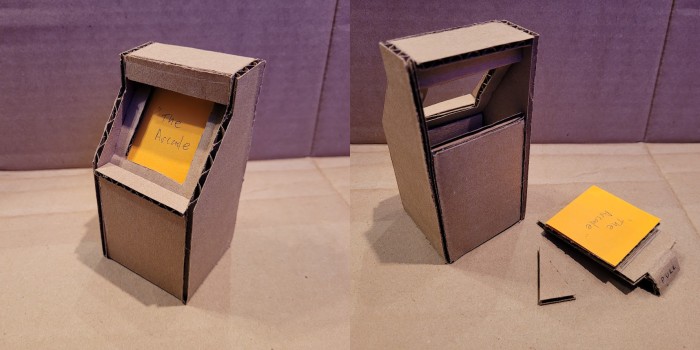
Now we’re in to the really whimsical displays. I free-handed the design of this one, making it up as I went. So you’re seeing me figure it out in these progress shots.
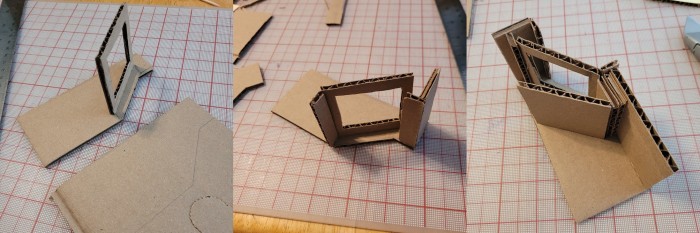
The first thing was to cut the sides of the arcade cabinet so it looked about right. Then I started cutting pieces (such as the "screen") and hot-gluing them directly into vertical position so I could see how it was looking. This is where the viscosity and fast setting of hot glue really shines.
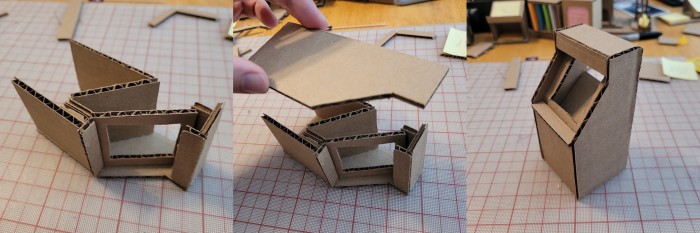
It’s really not as complicated as it looks. Or maybe it is, but it wasn’t exactly hard, nor rocket science. I just made what looked roughly correct to complete the cabinet. I can’t remember if I even bothered to look at an actual arcade machine for reference?
The angled area is designed to make it easy to slide notes right behind the screen from the back of the cabinet.
Putting the other side of the cabinet on so that all of the corners were more-or-less square was a bit tricky, but if you can’t see any mistakes, then let’s both pretend there aren’t any.
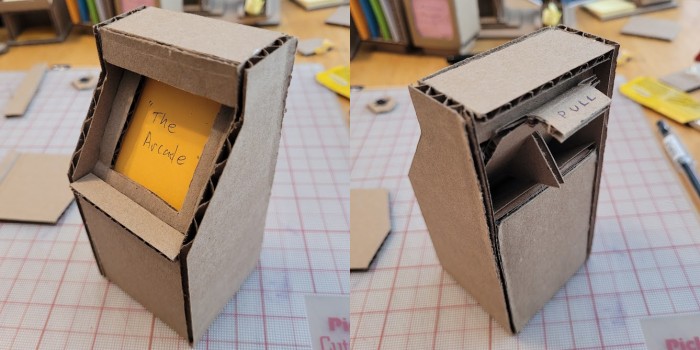
I think it looks pretty darn good for a first attempt. How well does it work? Way better than you might fear. It has a wedge-shaped piece in the back that jams securely into that angled display area with your sticky notes pressed against the screen opening. A pull-tab on the back to make it easy to pull out the wedge with the stack.
The Castle
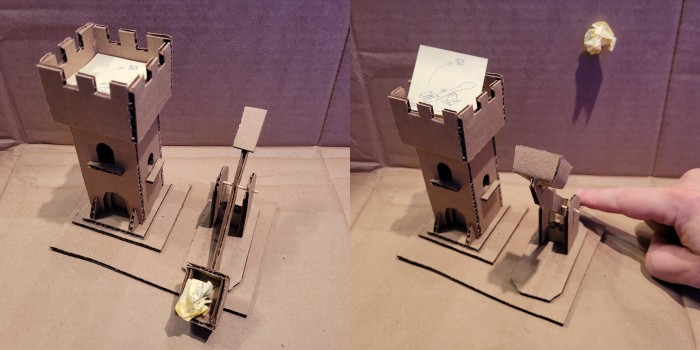
And last but not least, here’s my most whimsical build. As if the castle theme wasn’t enough, this has a working catapult to send your completed projects or tasks flying (at your enemies, into a trash can, or perhaps lit on fire into a small cardboard village nearby).
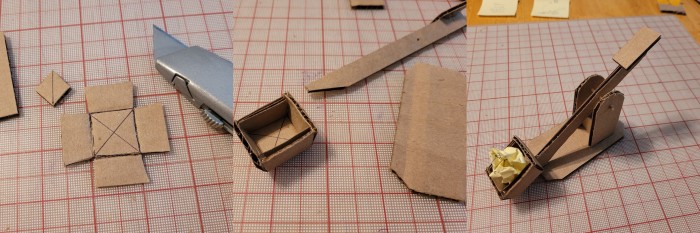
As you can see the bucket of the catapult is a single small piece of cardboard with angled cuts and folded and glued into shape. The arm of the catapult is a single strip of cardboard and it pivots on a toothpick (the second build to use a toothpick as a mechanical part - the first being The Kiosk). It works quite well, actually!
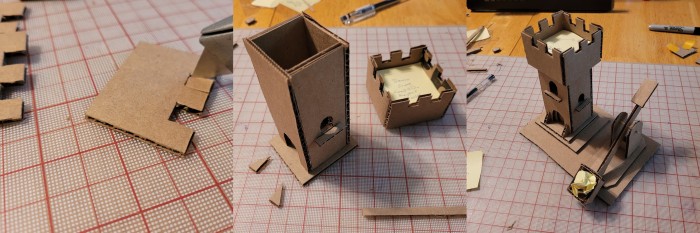
I’ve cut a lot of crenellations in cardboard, having made several toddler-sized cardboard castles for my kids, so this little one was familiar ground.
The top of the castle was sized to fit the sticky note stack. The rest of the castle has some architectural details such as arched windows with little sills.
I was tempted to keep going (drawbridge, outer walls, etc.) but decided this was already fun enough.
A proper how-to
As I mentioned at the top of this page, I did make a model intended to be a real how-to instructional project.
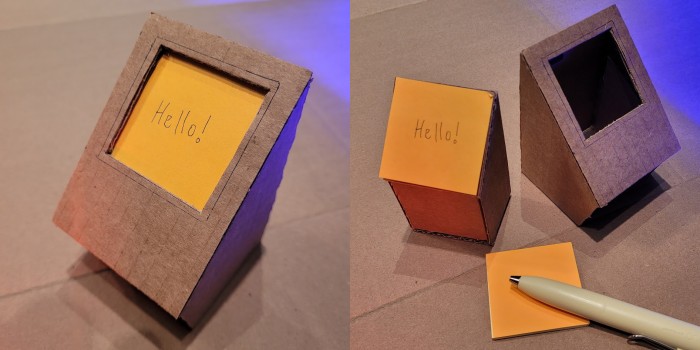
To make this display, check out How to make a cardboard Project Stack display.